Wednesday, September 14, 2011

Spicing Up Your Humble Abode For Fall!

Let me first state that I am no professional home decorator, I just know what I like when I see it, and those are the tips I am going to be sharing with you today :) Decorating your home doesn't have to be a huge task as many think. I think it is the word in itself that can be intimidating to those on a time constraint or those who just don't have confidence in the creative person inside of them, but fear not, making your home look "spiffy" is not rocket science, I promise!

Lets jump right in as I have so many pretty awesome things I want to show you guys.

1. Fall Floral Centerpieces--Displaying floral arrangements in areas where a lot of people gather (ex kitchen, living room, front foyer) can be an excellent way to add some pizazz to your home! You can use either silk flowers or fresh ones depending on the type of maintenance you are able to do. The good thing about the fresh flowers is that you get to enjoy the scent, but I think for lasting power it may be smarter to use the silks! A few examples of some flowers that can be included in your fall arrangement would be sunflowers, chrysanthemums, gerberas, roses, lilies etc.  Fall colors include shades of red/burgundy, oranges, yellows, greens, almost any color that can be found on the changing colors of the leaves on the trees :) 


** Choose a rustic looking vase for an optimal look, and don't be shy to add a plaid bow with some plaid ribbon that can be found at your local craft store, this really ties everything together. You will see that ribbons are something I mention a lot in this post because I really think its such a simple way to spruce things up! 


 2. Outdoor Decoration Florals: --Mums are a very popular Autumn floral that can be found outside many homes as decorative pieces.  They really add curb appeal if you ask me :) I love the vibrant colors they come in, and honest to goodness, they last forever! haha Something I like to do with these is change out the pot they come in (mine come in a cheap plastic pot with some cellophane wrapped around it), and place them in ceramic clay pots, pretty inexpensive but makes all the difference! Next I love buying many different patterns of ribbon from my local craft store, plaids, reds etc., and tying a bow around the pot with these.  It adds something so homey feeling to them and makes them look even more "handmade".  

*If you are really feeling nifty, you can also buy some pumpkin garland (pretty much garland but with mini pumpkins and leaves etc) and use this to decorate your pots as well, use your imagination and go crazy! 

Pumpkin Garland


3. Decorative Votives: --I don't know about my readers, but there is nothing I love more than feeling warm and cozy during those brisk Autumn nights.  What better than creating your own Fall votives?! This is something I am definitely going to be trying out this year. It's so simple and requires only what you want, oh and a candle of course :) 

*Some common things to include when making a decorative fall candle would be gourds, decorative apples/pumpkins, decorative leaves, Indian corn etc. What you want to do is place your candle on a dish a few inches larger than the diameter of the actual candle, preferable something appealing to the eyes :) Next overlay some of your decorative pieces around the candle on the dish. So Simple I tell you, yet looks so beautiful when you take your time with it.


4. Glitter Pumpkins! --Ok, I had you at glitter right?! haha Anything with glitter seems fun to me, and no this does not have to get super messy if you follow directions carefully, it's actually astonishingly simple but by far my favorite craft for the Fall ! No, I didn't come up with this idea myself, I have to give credit where it is due, and I shall. I actually came across this in a video on YouTube and thought oh my goodness, I HAVE to do this! She makes it look so fun! Below I am going to link the video so that once you gather the three things you need, you can watch and create :)

* If you choose to do this on real pumpkins, they should last a few weeks as we know the pumpkins will eventually go bad. However, if you choose to do this on decorative fake pumpkins, they can last very very long! You can do the entire pumpkin, like shown in the video below, or you can even just do the parts you would normally carve out to make funny faces in glitter for kid approved ones! :) 


5. Fall Flare Wreath--Wreaths are perhaps one of the staple items that stay around for 75% of the year throughout many of the holidays.  They are something that, with a change in colors and theme, can always decorate your door for something splendid.  In the Spring, we do a wreath made of Lavender and boy is it gorgeous, in the Fall, we do wicker handmade wreaths and in the Winter, we do the Balsam wreaths in typical Winter Fashion.  


Well that's it for this edition of my Fall rambles haha I really truly hope this blog post made some of you want to go out there and get your "creative on"! lol I love being inspired to make my home look nice during different seasons/holidays, so I thought I would pay it forward to you all. I am not the most crafty person so all of these things are for beginners trust me! Just think of how amazing your home will look, I bet you will have people asking you who you hired to do it ;)

Gourds, Indian Corn, Pumpkins and Glitter Galore! ,

xox

Tuesday, September 13, 2011

Putting the Plant in 'Plant'ation Shutters

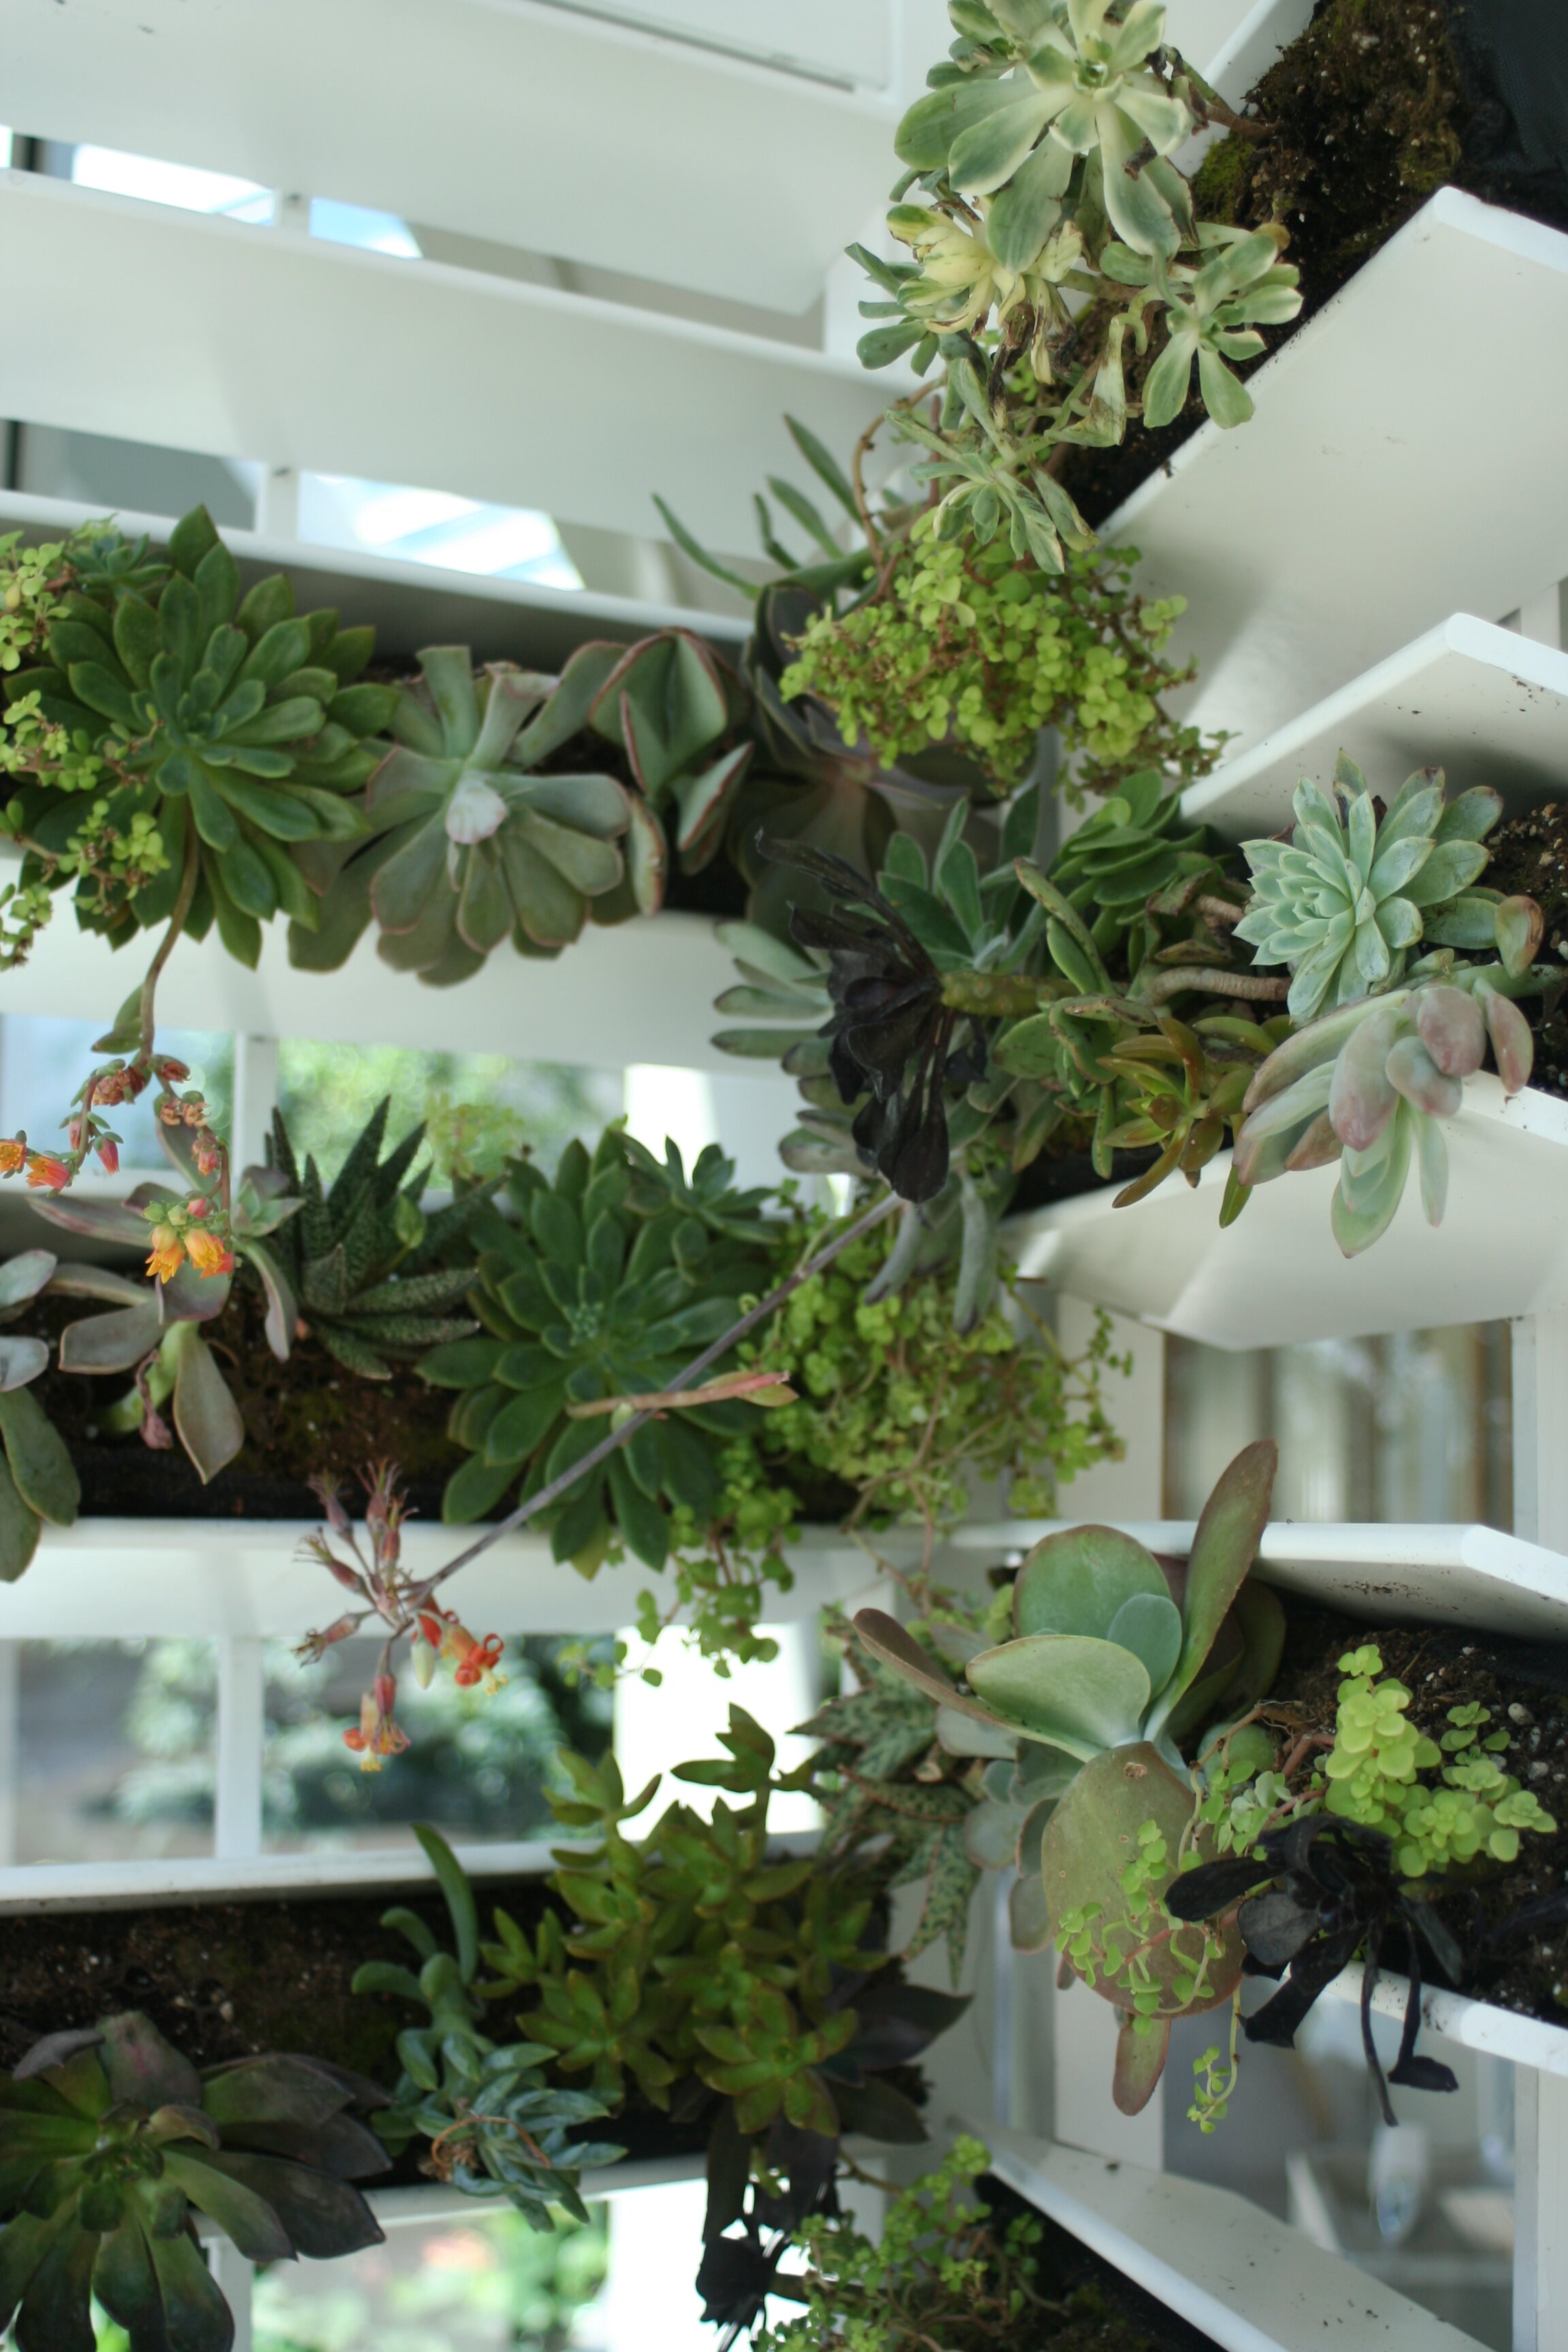
Looking to add a little green to your Plantation Shutters, just make a 'Plant'ation shutter planter.  With her environmentally friendly thinking and creative talents Cynthia Bee, of designresourceutah.com, donated her time and talents to the Conservation Garden Park. Using an idea from another floral designer Cynthia created a living work of art by transforming a used pair of plantation shutters into a planter by adding water wise succulent plants to the shutters. Read on to find out more about this project.  In addition check out Cynthia's blog Utahgardenblogs.com for other information and ideas for your home and garden.

Otherwise known as a 'Plant'ation Privacy Screen. Like many of you, I saw the original idea for this project in Sunset Magazine, though I am sure the designer who created it was not the first to do this, she certainly did it up beautiful! The Sunset Magazine version featured a gorgeous project completed by San Francisco area floral designer, Baylor Chapman of LilaB Designs. The magazine gave a little information on how the shutters were constructed and it sounded pretty basic (weed barrier fabric was stapled to the shutter to create pockets), so I thought I'd give it a try.


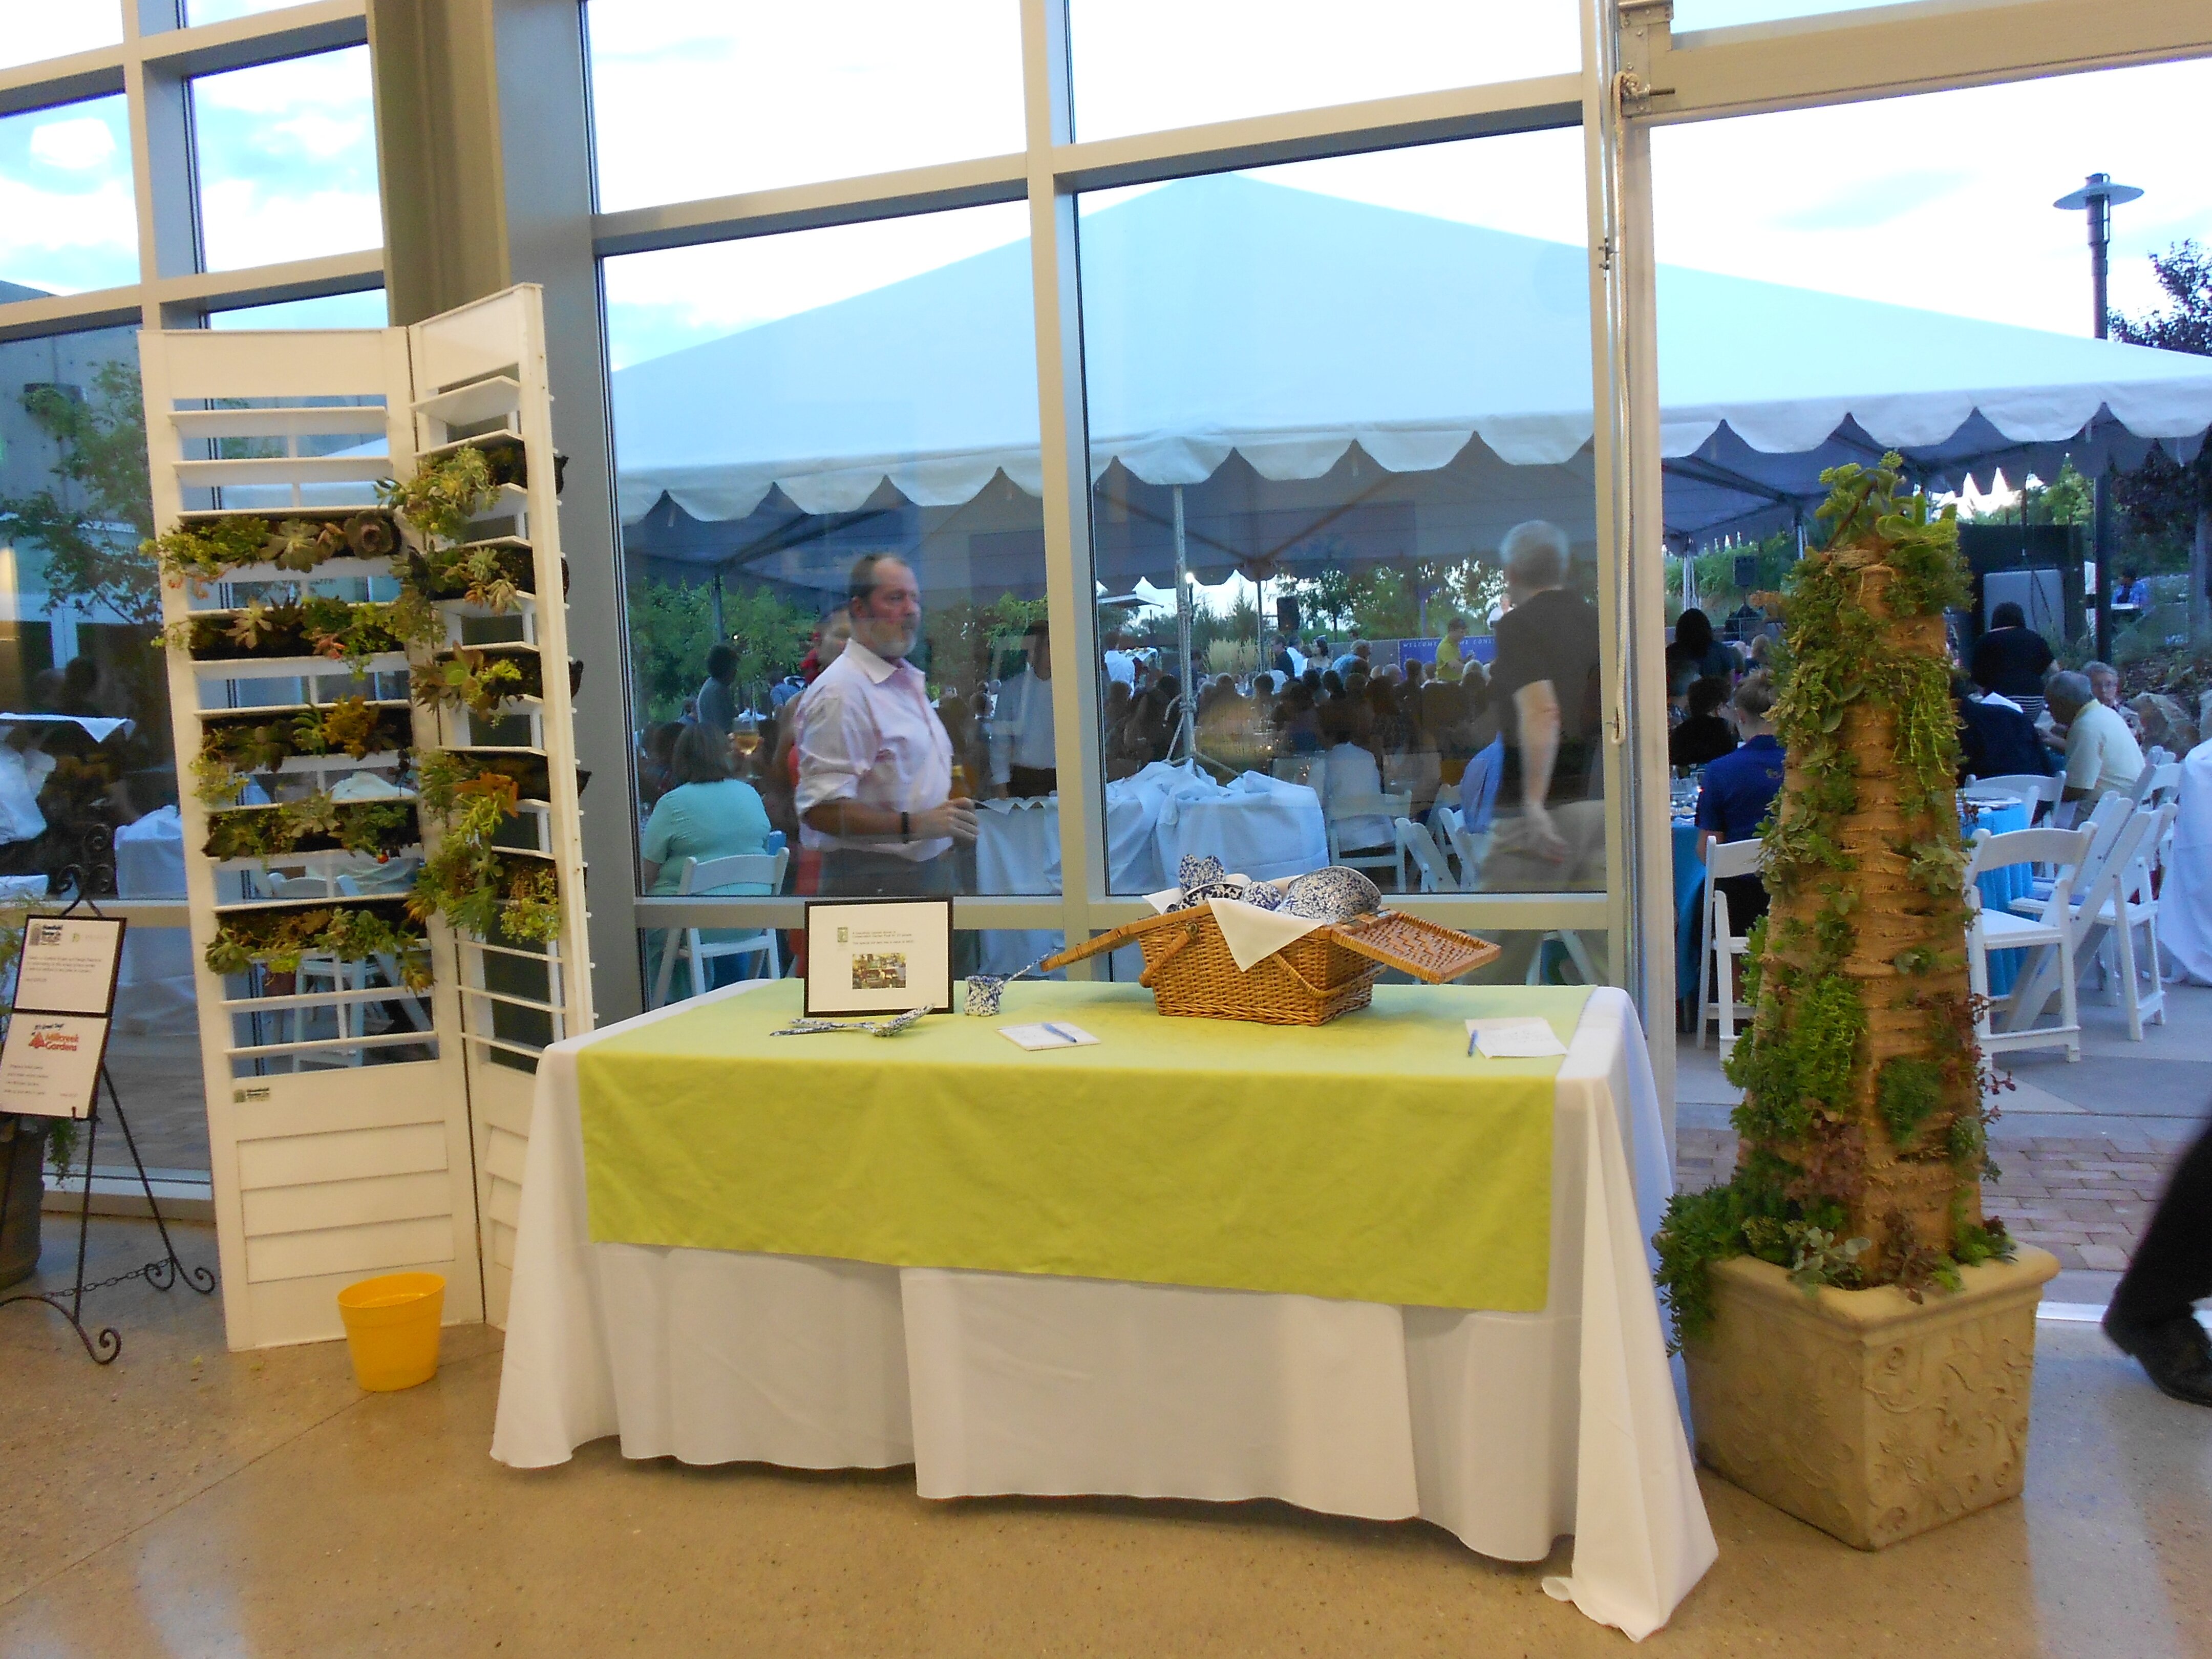
"'Plant'ation Privacy Screen on the auction block at the fundraising Gala for Conservation Garden Park"


Except that I don't live in the ideal climate provided by the California Coast which meant I had a lot more factors to take into consideration than the original designer would have to worry about. Not even succulents can survive our real-world heat and intense summer sunlight planted in just weed barrier fabric pockets! In addition, I did't want to be limited to just Utah-hardy succulents (sedums and sempervivums), I wanted to enjoy the massive array of Mediterranean climate succulents- which means overwintering them indoors and THAT meant making it possible for the plants to be overwintered indoors. This "easy" project is getting a lot harder already! Luckily, I like a challenge and I lack a reliable idea filter.


The first thing I needed to make the project work was a plantation shutter. Ideally, you'd use solid wood (as I did) or, even better, vinyl. The classifieds section is a good place to find a used shutter. Since I was creating my to be a one-of-a-kind piece for a Charity auction to benefit Conservation Garden Park, I decided to try and get a nice one donated.


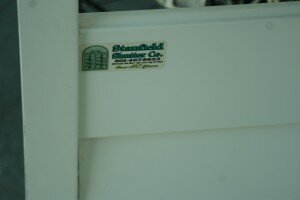
I was a little nervous to call Stanfield Shutter (the leading company in this area for plantation shutters) and tell them about my crazy idea! Thankfully, not only did they hear me out without hanging up, they gave me a huge 6 foot tall by 4 foot wide shutter with extra wide slats to play with! Thanks to Stanfield Shutter!


"Thanks to Stanfield Shutter for donating this gorgeous plantation shutter!"


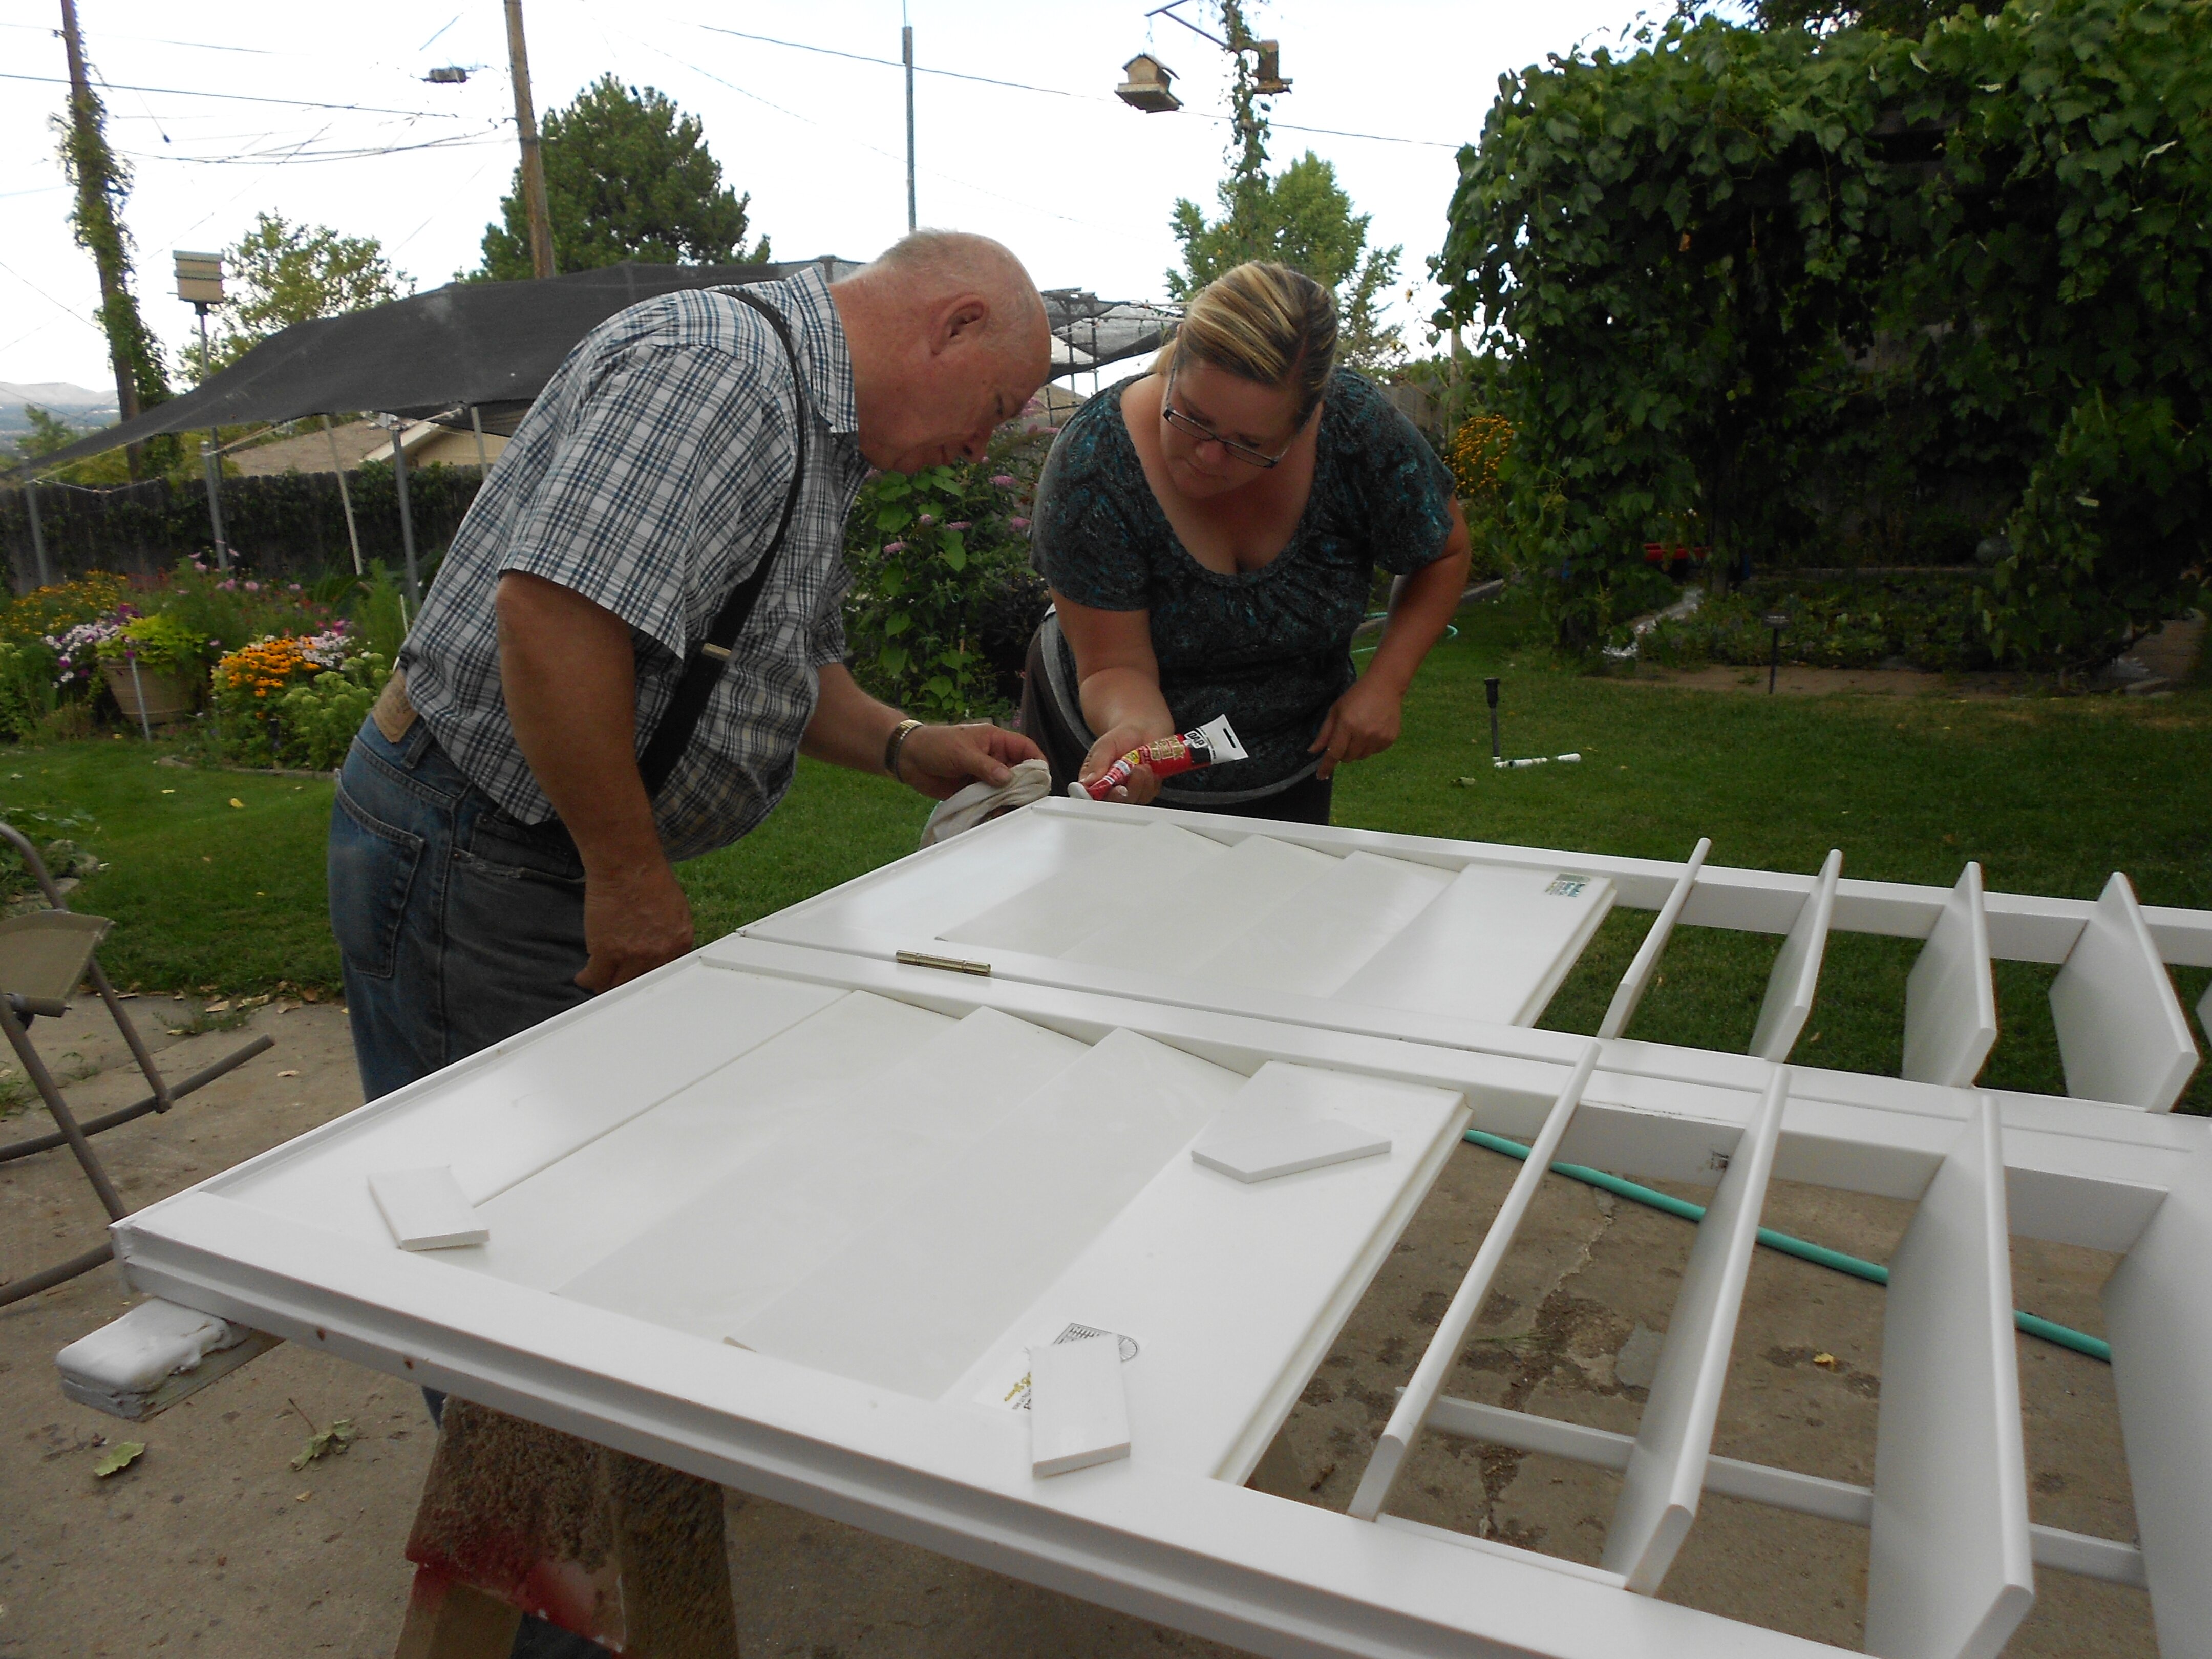
The next step was to retrofit it for our purposes. This meant adding vinyl trim pieces to the top and bottom of the shutter for better weather protection and gluing vinyl wedges between the slats to hold them in the desired open angle. I just purchased vinyl trim pieces from Home Depot for trimming out the shutter. My poor Dad (pictured below) is often roped into things like this, bless his heart. He's trained so well now that he just helps me get it done without thinking I've totally lost it. My spouse is still on a learning curve with that but he'll figure it out eventually!

"Retrofitting the shutter for long-term viability."


Once the plantation shutter is prepared, it's time to make the custom pockets. Now, I used a piece of paper to trace the shape along the ends I needed for the boxes which would account for the slope. That caused one side of my square shape to be longer than the other. Honestly, you could probably get away with just doing the sides the same length- once the plants grow the difference will be minimal.


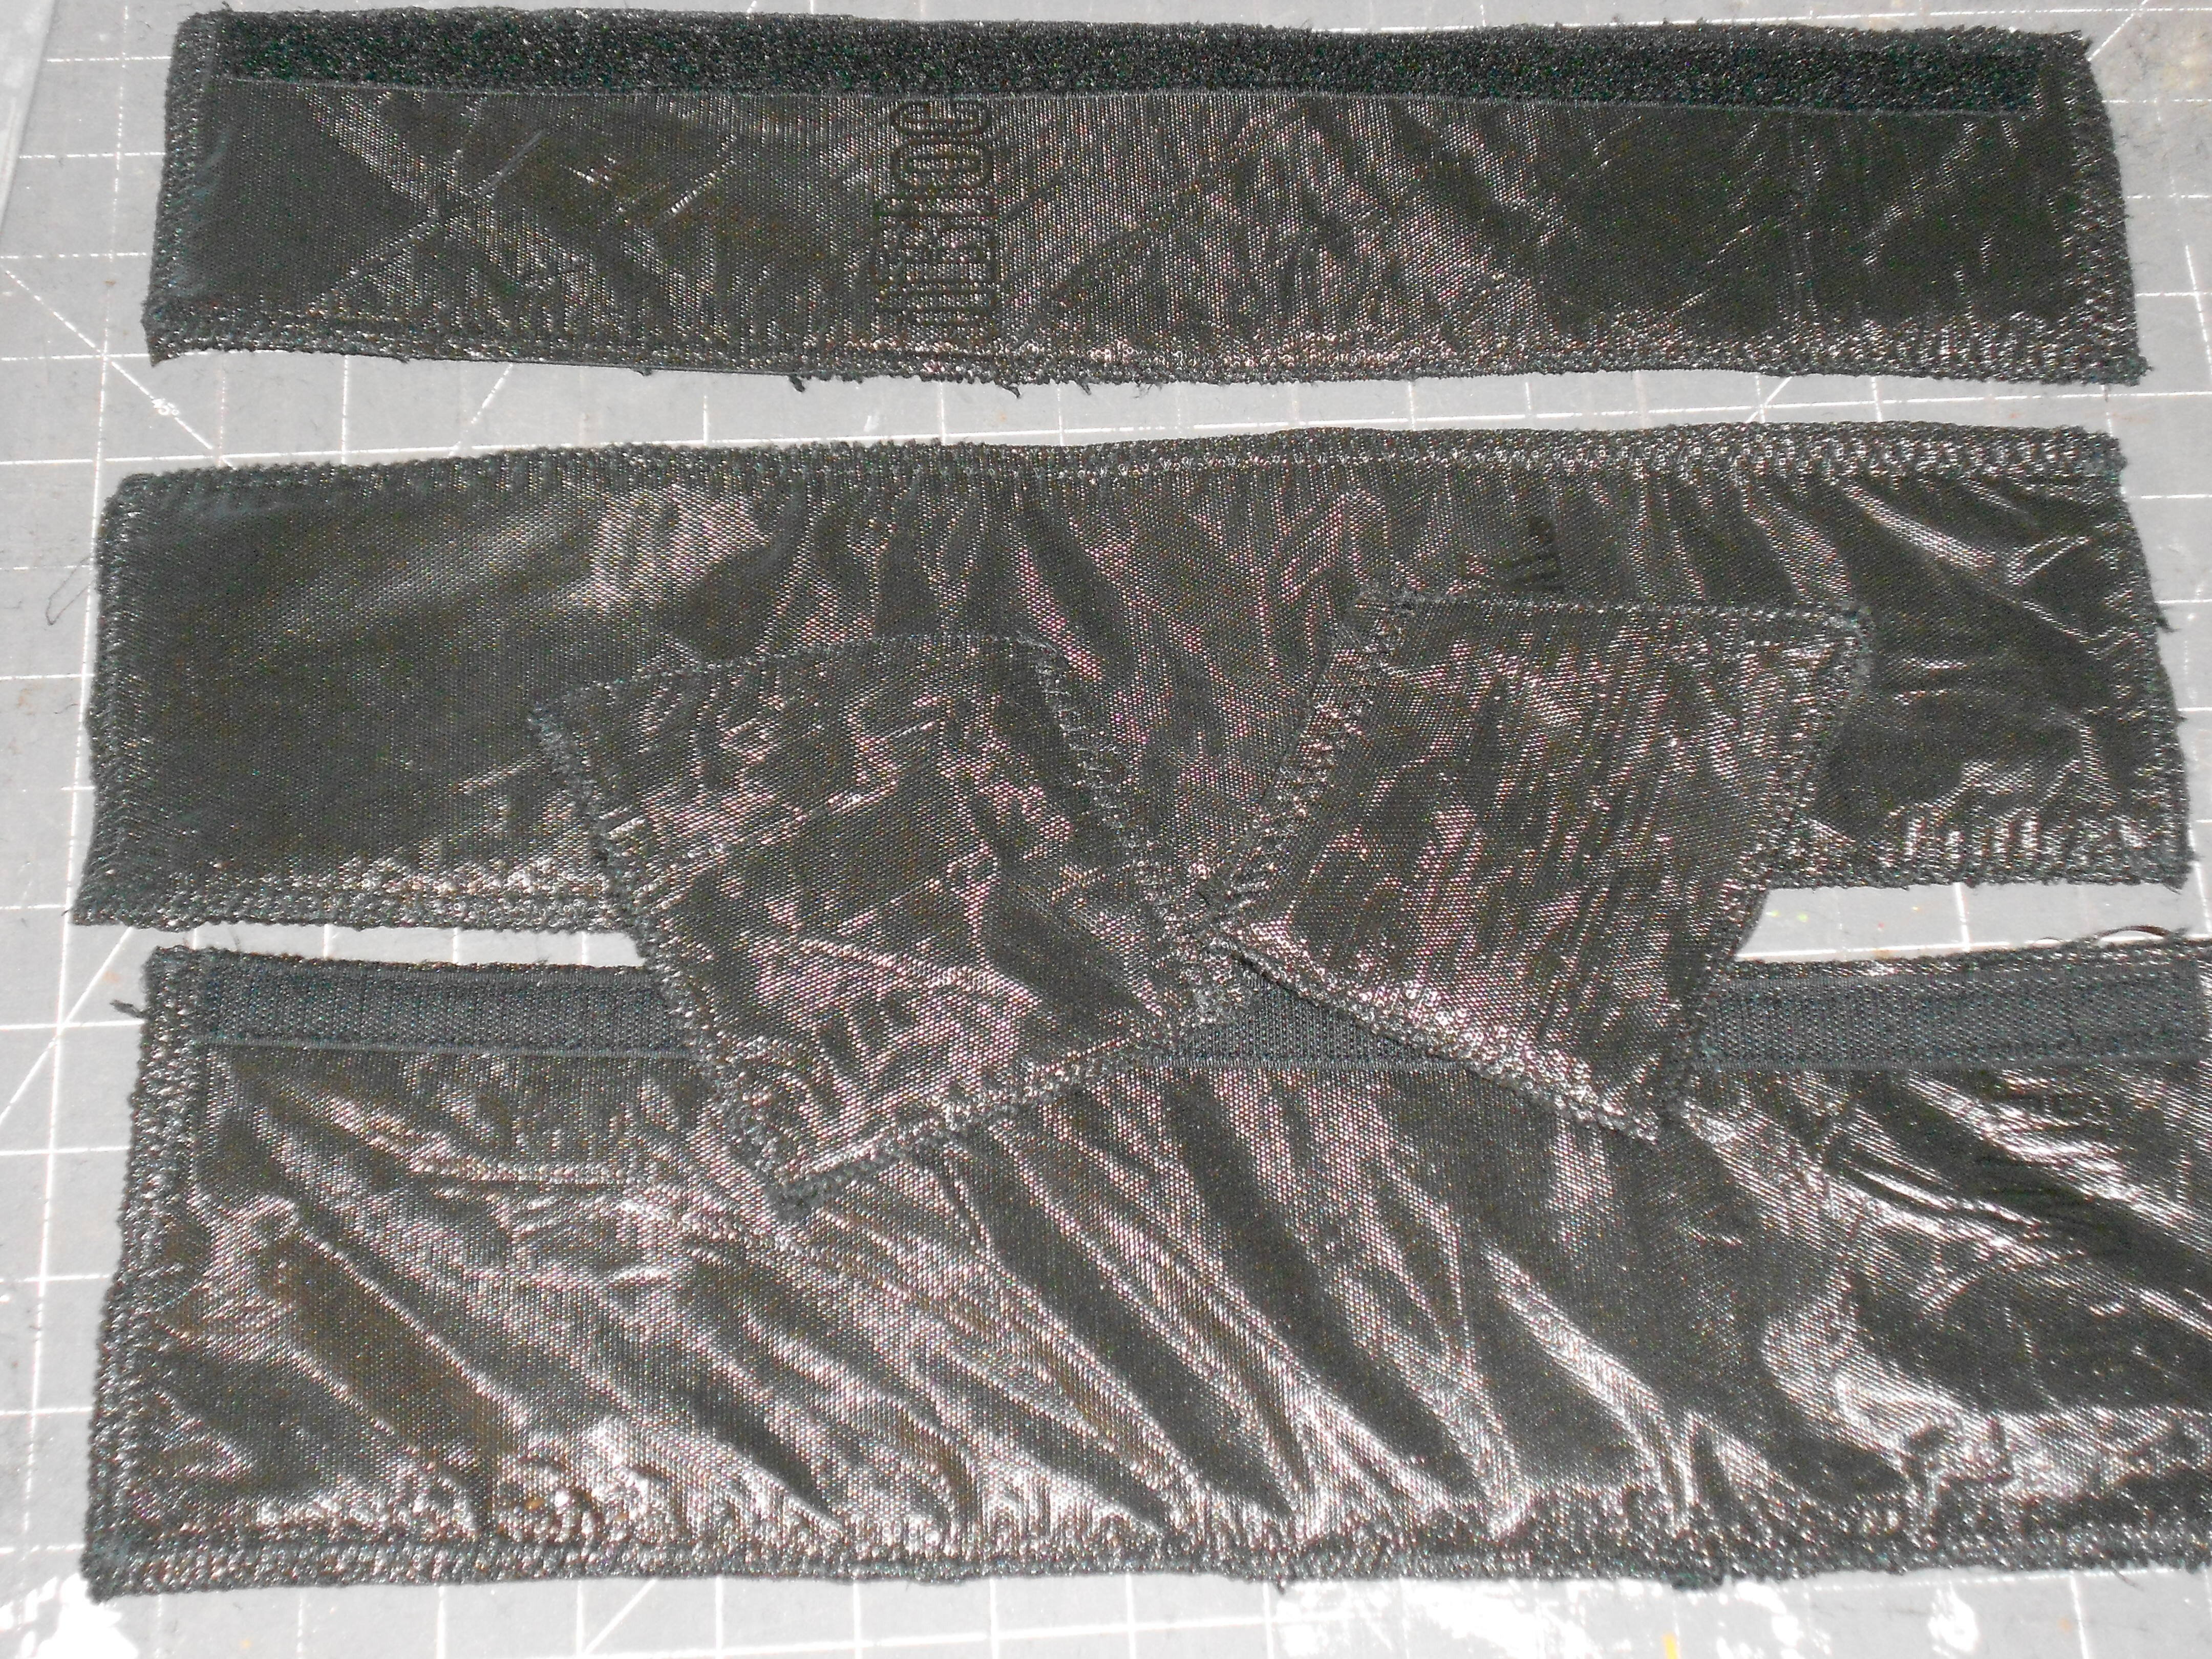
To create the pieces of the box, I used a layer of weed barrier fabric on the outside (allows air and water to pass but not too quickly), 2 layers of felt in the middle (to help insulate, hold water longer, and help retain the shape) and then a layer of burlap on the innermost surface (to give the roots something to grip). At first, I tried to make the seams be on the inside of the pocket but that doesn't work so well. You won't see the pockets so go ahead and do it the easy way by sewing the seams so that they are on the outside of the box. Just trust me on that!

"Pocket pieces before stitching together."


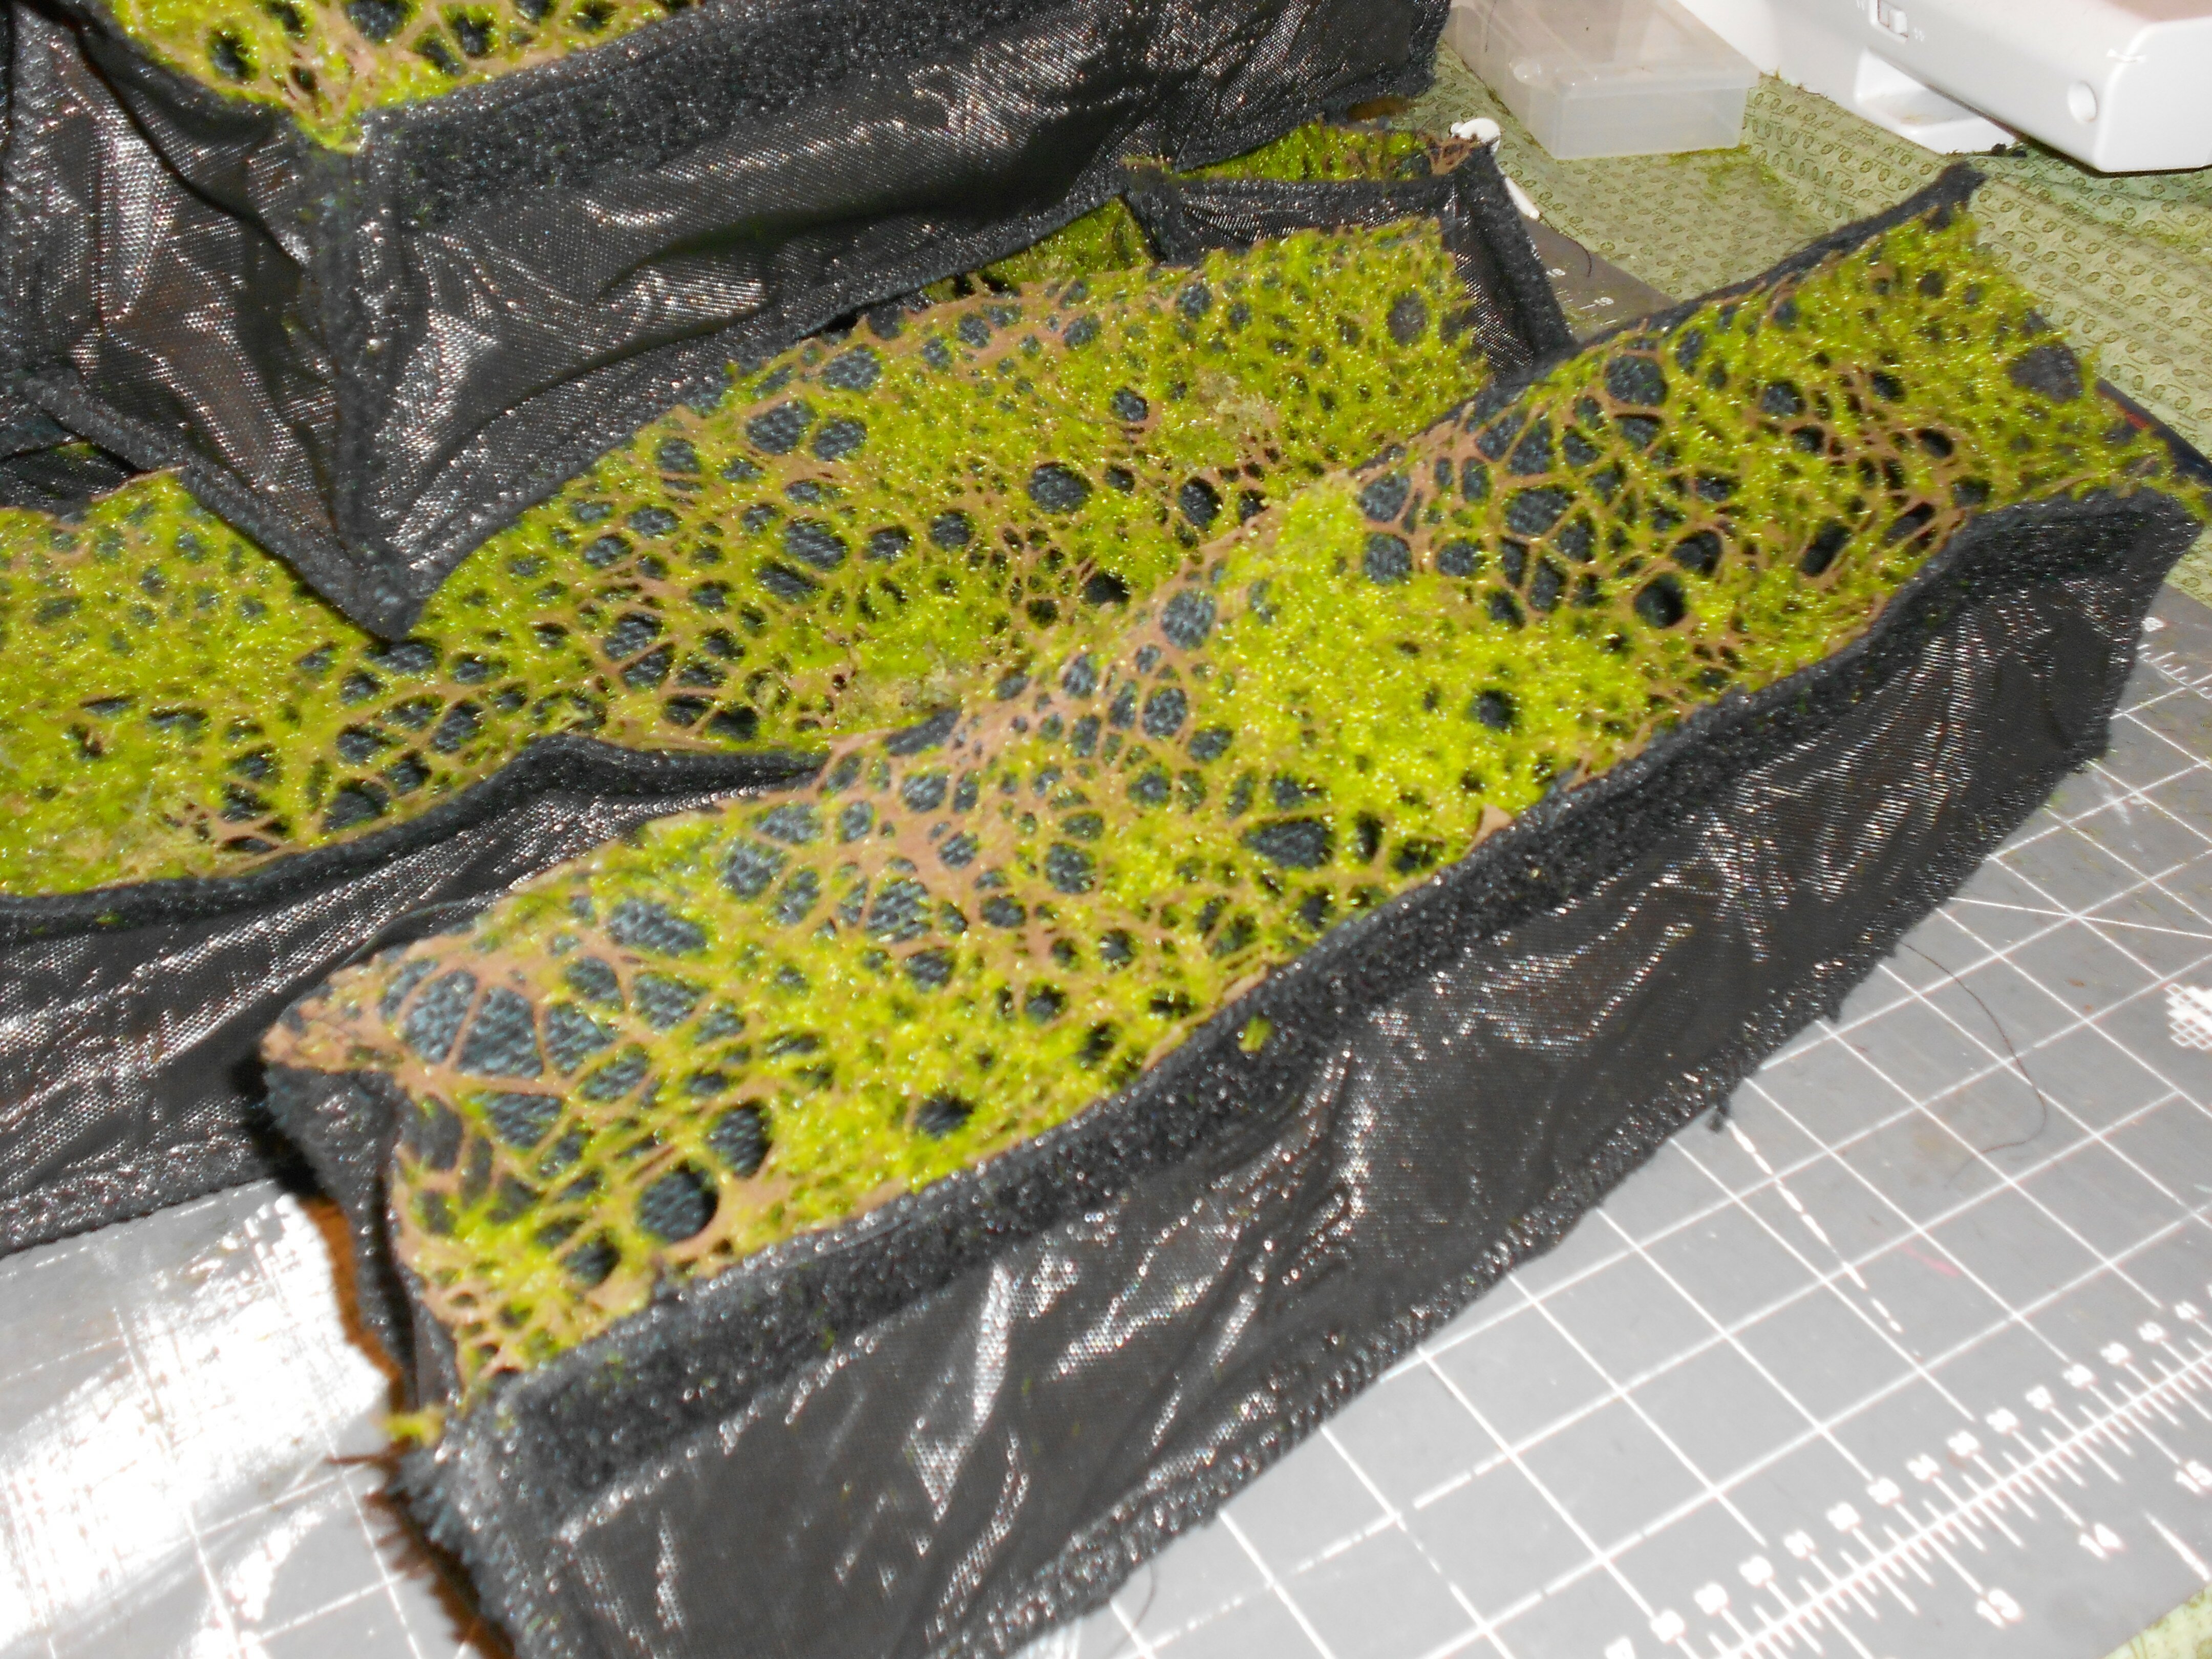
For the top, I used a special 'fabric' type thing I get locally at Tai Pan Trading. It is a synthetic mesh which has real moss adhered to it. It's messy. Bits of it are still in my sewing machine but it's worth it. The mesh works really well for vertical gardening projects because it enables the plants to grow through it while the brown mesh and green moss serve as camouflage for the other elements in a vertical application. I wish I could find an online source for it but since I don't even know what it's called, that would be hard. I am sure you can use other types of mesh product so long as they have larger holes (no fine mesh). Even so, you'll still have to cut a few bigger holes in the mesh to insert the plants.


"Empty pockets with moss mesh tops."

I filled the finished pockets with a special soil formula which involved perlite, succulent soil mix and coconut fiber. As always, I rinsed the soil off the original plants. Every grower useke our REAL sun at this altitude! This screen has spent most of it's time indoors since it was planted. I watered the plants thoroughly right after planting 2 weeks ago and just now watered them again. Please note, the plants NEED to dry out after watering. They prefer a good soak so the soil is fully wet and then a good period of dry soil before wetting it again. A consistently moist soil or lightly misting them with a spray bottle will produce less desirable results. Consistently moist soil is the kiss of death for succulents while misting will create shallow roots and weak plants.

In the proper setting and with a water resistant shutter, you wouldn't have to remove the pockets at all for watering outdoors, just s for plants to be added. Cut the mesh as needed to get the root balls inserted. You MAY have to sew or zip tie the mesh closed if the hole is large."


As for watering frequency, the succulents would need to be watered about once per week if the shutter is outside and in PART SHADE- the non-hardy succulents can't take our REAL sun at this altituden: left;">The end result of all this work is a planted privacy screen that can be installed on a deck for the warm season and stored away in the cold months (unless you've got a sunny south window and a tile floor indoors!) The plant pockets can be removed for watering if you don't have a vinyl shutter and you want to ensure better long-term survival of the shutter. The pockets are narrow enough to overwinter in a sunny windowsill.


"Plants will eventually be large enough to hide the gaps."

The end result of all this work is a planted privacy screen that can be instathem into the shutter openings but you can get away with putting them in immediately so long as you don't move the screen around much.


"Pockets fitted into the Louvers"


Pockets can be repositioned to improve privacy. Plants will grow at least 3x larger than their current size.

In the case of my planted pockets, the winners of this item are out of the country for awhile so I'll likely be overwintering it for them in a nice warm greenhouse with all of my own plants. I wonder if my work will notice that I snuck them into our new greenhouse!?


Ideally, you would let the plants grow in the pockets for a 6-8 weeks to establish themselves before popping them into the shutter openings but you can get away with putting them in immediately so long as you don't move the screen around much.


I'd like to make a screen FOR MYSELF now that I've got the whole process figured out and engineered but I'm rather worn out from making this one! I will confess that part of me hopes the new owners decide they don't really want it (and the required maintenance) and I get to keep it! Cross your fingers!


The project CAN be done reasonably cheap if you can find an inexpensive used shutter and use small plants. A little patience always pays off with succulents as they'll propagate themselves given the right conditions. The pockets are a bit time consuming if you sew them so they are removable as I did.

"On display for the Garden Gala"


If you just want to keep it outside permanently, you can probably get away with stapling the materials to the slats as the original designer did but I would recommend you use similar materials to those I recommended above or your plants will dry out much too quick.


I would rate this project a 3 of 5 stars for difficulty if you're making removable pockets as I did. If you just staple the fabrics in place, it's a 1 of 5 stars for difficulty but may be more a pain over the long term for maintenance. While the project is not that hard, it can take a lot of time to create AND care for. Make sure you're willing to do both of those things before starting. If anyone else is crazy enough to attempt it, feel free to ask questions in the comment section or e-mail me. I'd love to see photos when you're done!

Monday, September 12, 2011

Fall Season Meets Beauty Routine


 With the fall weather approaching, there are a few key things to keep in mind when it comes to skin care. 

1. The cooler air and the heat you may be forced to blast in your car as the nights get rather brisk, are two things that can severely dry out your skin! Be sure to alter how much you moisturize to compensate for this, no one likes dry crackly skin.

2. Remember to also maintain using SPF in your skincare somewhere.  Just because you don't see or feel the sun, doesn't mean its harmful rays don't exist!

3. What did you all do this summer? Probably something that consisted of loads of sunscreen from sunbathing and makeup for those fun warm nights out on weekends right? Well now is the time, as the weather is changing and those warm nights are coming to an end, to exfoliate your skin and do a nice deep cleanse. You want to make sure you dig deep down in your pores to remove any excess residue left behind from this warm humid summer season.

That all being said, there are a few fun ways to incorporate one of my favorite sights to see in the fall, Pumpkins, into your daily beauty routine! :)


Vitamins A & C are collagen building and Zinc is a great helper to fight off those blemishes, and guess what?! these things are all found in pumpkins! 
Here is a QUICK and super EASY recipe for a killer pumpkin treat for your lovely skin : 

1. Firstly, you want to carve out the seeds from your pumpkin.  
2. Slice your pumpkin into smaller pieces and peel the skin off.
3. Place these pumpkin pieces into a steamer or colander (whatever you have on hand), and steam over some boiling hot water for about 45-50 mins (pretty much until tender, which you can make sure of with your fork!)
4. After the pumpkin pieces are nice and tender, puree them in your food processor. 
5. Let this puree mix cool off, after all we don't want to place something super hot on our faces! haha 

-2 Tsp. of the cooled pumpkin puree
-1/2 tsp honey (I use organic honey because remember this is going to be absorbed into your skin!)
-1/4 tsp milk
-1/2 tsp. brown sugar (this adds to make a wonderful exfoliant!)

* if you have oily skin, leave out the brown sugar and use 1/4 tsp. apple cider vinegar, it works wonders ;)
Leave this mask on for 10-15 mins, rinse off, pat dry with towel and you are on your way to better looking skin, in just 15 mins! :)

Another quick treat for your skin, that is so delicious sounding you may want to eat it! : 

1. In a food processor or blender, combine 2 cups canned pumpkin, 4 tablespoons low-fat vanilla yogurt, 4 tablespoons honey, and 1 teaspoon pumpkin pie spice.
2. Slather this on your entire face, leaving your eyes out as always (they are super delicate!).
3. Leave this on for 10 minutes and then proceed to rinse as normal and pat dry.


A Great body exfoliant:

1/2 cup pureed pumpkin
1/2 cup brown sugar
1/4 teaspoon ground cinnamon

1. Combine all of the above ingredients and while in the shower, take a moist washcloth and proceed to scoop a table spoon at a time and scrub this all over your body starting by your feet and stopping at your neck.  (we use the other scrub above for the face :)
2. Be sure to work this into your skin in circular motions.
3. Rinse this off with warm water and I guarantee your skin looks and feels amazing!

While doing research and testing these scrubs and masks out myself, I found that pumpkin really works wonders on the skin, no it's not only good for making jack-o-lanterns and  making your front steps look pretty.  I always love finding ways to use all natural ingredients in my beauty regimen because what you put in and on your body is what you get out of it. If you want radiant healthy skin, eat healthy and use healthy beauty products right? :)

Hope you all have a wonderful start to the fall season, and to any of my readers who are still enjoying wonderful weather for the next couple of months, I envy you! haha

Pumpkin Patches and Beautiful Faces,

xox

Sunday, September 11, 2011

Shop and Tell!


Here is a list of the things I picked up during this run, pictured above:

First Stop in this "Shop and Tell"--Sephora/Target and MAC!

1. e.l.f Cream Eyeliner in Black from Target--I love this so far! It goes on smooth with my angled eyeliner brush and it has always lasted me all day and is super black! For only $3.00 you really can't go wrong. (comes in a few other colors as well)

2. MAC See Sheer Lipstick--I purchased this because it was the perfect sheer medium pink tone for the wedding I was in this past weekend. I was wearing a navy dress and didn't want something so pigmented and matte because I was doing a rather dramatic eye look. On the other side of that, I didn't want to do something that would be too washed out, needless to say this was the perfect choice! It is a great shade that can be layered for maximum pigmentation, but like the name says, it can also be that perfect "bitten" sheer medium pink tone as well :) I definitely recommend this as part of one of your staple lipstick shades from MAC.

3. MAC Painterly Paint Pot--I wanted to try something new and have always wanted to get more paint pots. I use this as an alternative to my Urban Decay Primer Potion. I love this because it is heavier and provides more even coverage on top of being an amazing primer.  I am totally loving this so far and look forward to purchasing most of the other shades as well.

4. Sephora Nano Eyeliners in Pearl Beige and Azure Blue--These little things (literally only a few inches) are great! I love the pigmentation and I really love all the shades they are available in!

5.DUO Lash Glue in the dark tone-- Special Occasions call for lashes! I picked this one up as an alternative to another one I had that was regular white--I love that it dries dark and it for sure held my lashes all night! :)

6. Makeup Forever Mat Velvet Foundation--I used this for the first time last weekend, literally the day after I purchased it. I was nervous, because I have never used a foundation at all before, but figured for a wedding where lots of pics are being taken, I should have something.  I love this foundation--although it is a thicker formula (so I hear in comparison to others) with a light hand, it can give you just the coverage you need. It also kept me matte for the majority of the night! Perfect shade as well. Definitely will use this again.

7.Urban Decay All Nighter Spray--I have heard of this a ton of times and was always meaning to pick it up. Sometimes when I go out for special occasions, I am out well into the evening and want my makeup to last me.  This worked without a doubt for me, 7 hours and my makeup didn't budge at all!


Next up, my final leg of the shopping voyage this week, Bath and Body Works.  I love when my house smells good, it just makes me happy honestly! haha I love the fall because of the wonderful colors and scents that come along with it.  Bath and Body Works is the perfect place to find all of the candles that capture the best scents of the Fall season and you are guaranteed to have a yummy smelling house!

1. 4 oz. Candles in:
       --Creamy Pumpkin
       --Kitchen Spice
       --Smores--MY Favorite of the bunch--oh my goodness, smells JUST like real smores!!
       --Mountain Leaves
       --Pumpkin Caramel Latte--Another Favorite, sweet pumpkin like something from Starbucks haha
       --Homemade Cookies (not pictured because I gave it  to my boyfriend's sister, she's quite the baker! lol)

2. Mini Candle in Marshmallow Fireside--this is a mini that I got free with a coupon but smells so good that I will be returning to purchase the big size asap!

3. Mini Anti-bacterial to-go in:
       --Chocolate Chew (not pictured because I gave this to my boyfriend's sister as well!)
       --Cranapple Crisp
       --Phantom Pumpkin
       --Bat Bite Apple
       --Creamy Pumpkin

4. Wall Flower in Japanese Cherry Blossom (I will insert a pic of it below as I hastily put it up in my bathroom) haha


Well that completes my Shop and Tell.  I hope you all like the setup--I took less space with the pics and did more explaining, because that is what this is about after all right?! :)


Cozy Autumn Smells and Blissful Beauty,

xox

Friday, September 9, 2011

A Little Something Special For The Bride...


I quickly whipped up this photo story using my Windows Photo Story Program. I love doing stuff like this because it turns what can be bland pictures into a story! :) It wouldn't let me email it however, since it is a rather large file, so I decided to post it here.  What a fun day everyone had for sure--enjoy! xox

Two songs included:

1. Vanessa Williams-As the Years Go By
2. John Lennon- Imagine

Wednesday, September 7, 2011

Bridal Party FOTD


Products I Used On Myself And The Girls: 
 

1. Bronzer side of the Elf Bronzer and Blush Duo
2. MAC Painterly Paint Pot to prime the eyelids
3. Urban Decay All Nighter Spray to Set the makeup and make it last all night--which it did! :)
4. Urban Decay Eyeshadow in Smog
5.Makeup Forever Matte Velvet Plus Foundation in #45
6. Garnier Dark Under Eye Circle Roller
7. Covergirl Lashblast Mascara in whatever the blackest one is (I forget the name at the moment!)
8. MAC See Sheer Lipstick
9. Prestige Lip liner in Silk
10. Stila Kajal Eyeliner in Sapphire
11. NYX Jazz Nights Palette --This was the main palette used for all of the girls I did--LOVE the colors!
12. MAC Blush in Melba
13. Miss Adoro Lashes in #600 and #28
14. Duo Lash Glue in the Dark tone
15.L'Oreal Lineur Intense Liquid Eyeliner in black
16. Urban Decay Pore Perfecting Face Primer


Well there you have it, the list of ALL of the products used for all of the makeup I did that day including my own.  The makeup turned out spectacular and we all got tons of compliments on it! I had never done makeup for a wedding or even a large group of girls like this, normally I only do my own! It was very nerve wracking at first because of time constraints, but I made it work.  The other good thing is that I was doing the makeup for members of my own family, which made the whole process much easier because I didn't have to worry about using only products for clients and not mixing it with personal use makeup. My main goal was to make the girls look a little more dramatic for the sake of taking pictures, but also make them look themselves and not too out of their normal style. My second largest goal was to give them a look that would last all throughout the evening, and this was achieved thank goodness! The All Nighter Spray really does work! Staying Matte was a third goal and this was also possible for the majority of the evening.  Toward the end I saw a little shininess here and there, but nothing that a little blotting paper wouldn't help in an instant. 


All in all I had a wonderful time doing every ones makeup and it made me excited and happy that my cousin and my sister liked the outcome as well! 


Wedding Bells & Beautiful Belles of the Bridal Party, 

xox

Wednesday, August 31, 2011

How Your shutters are made......


Ever wonder how your shutters are made?  Click Above and Check it Out....